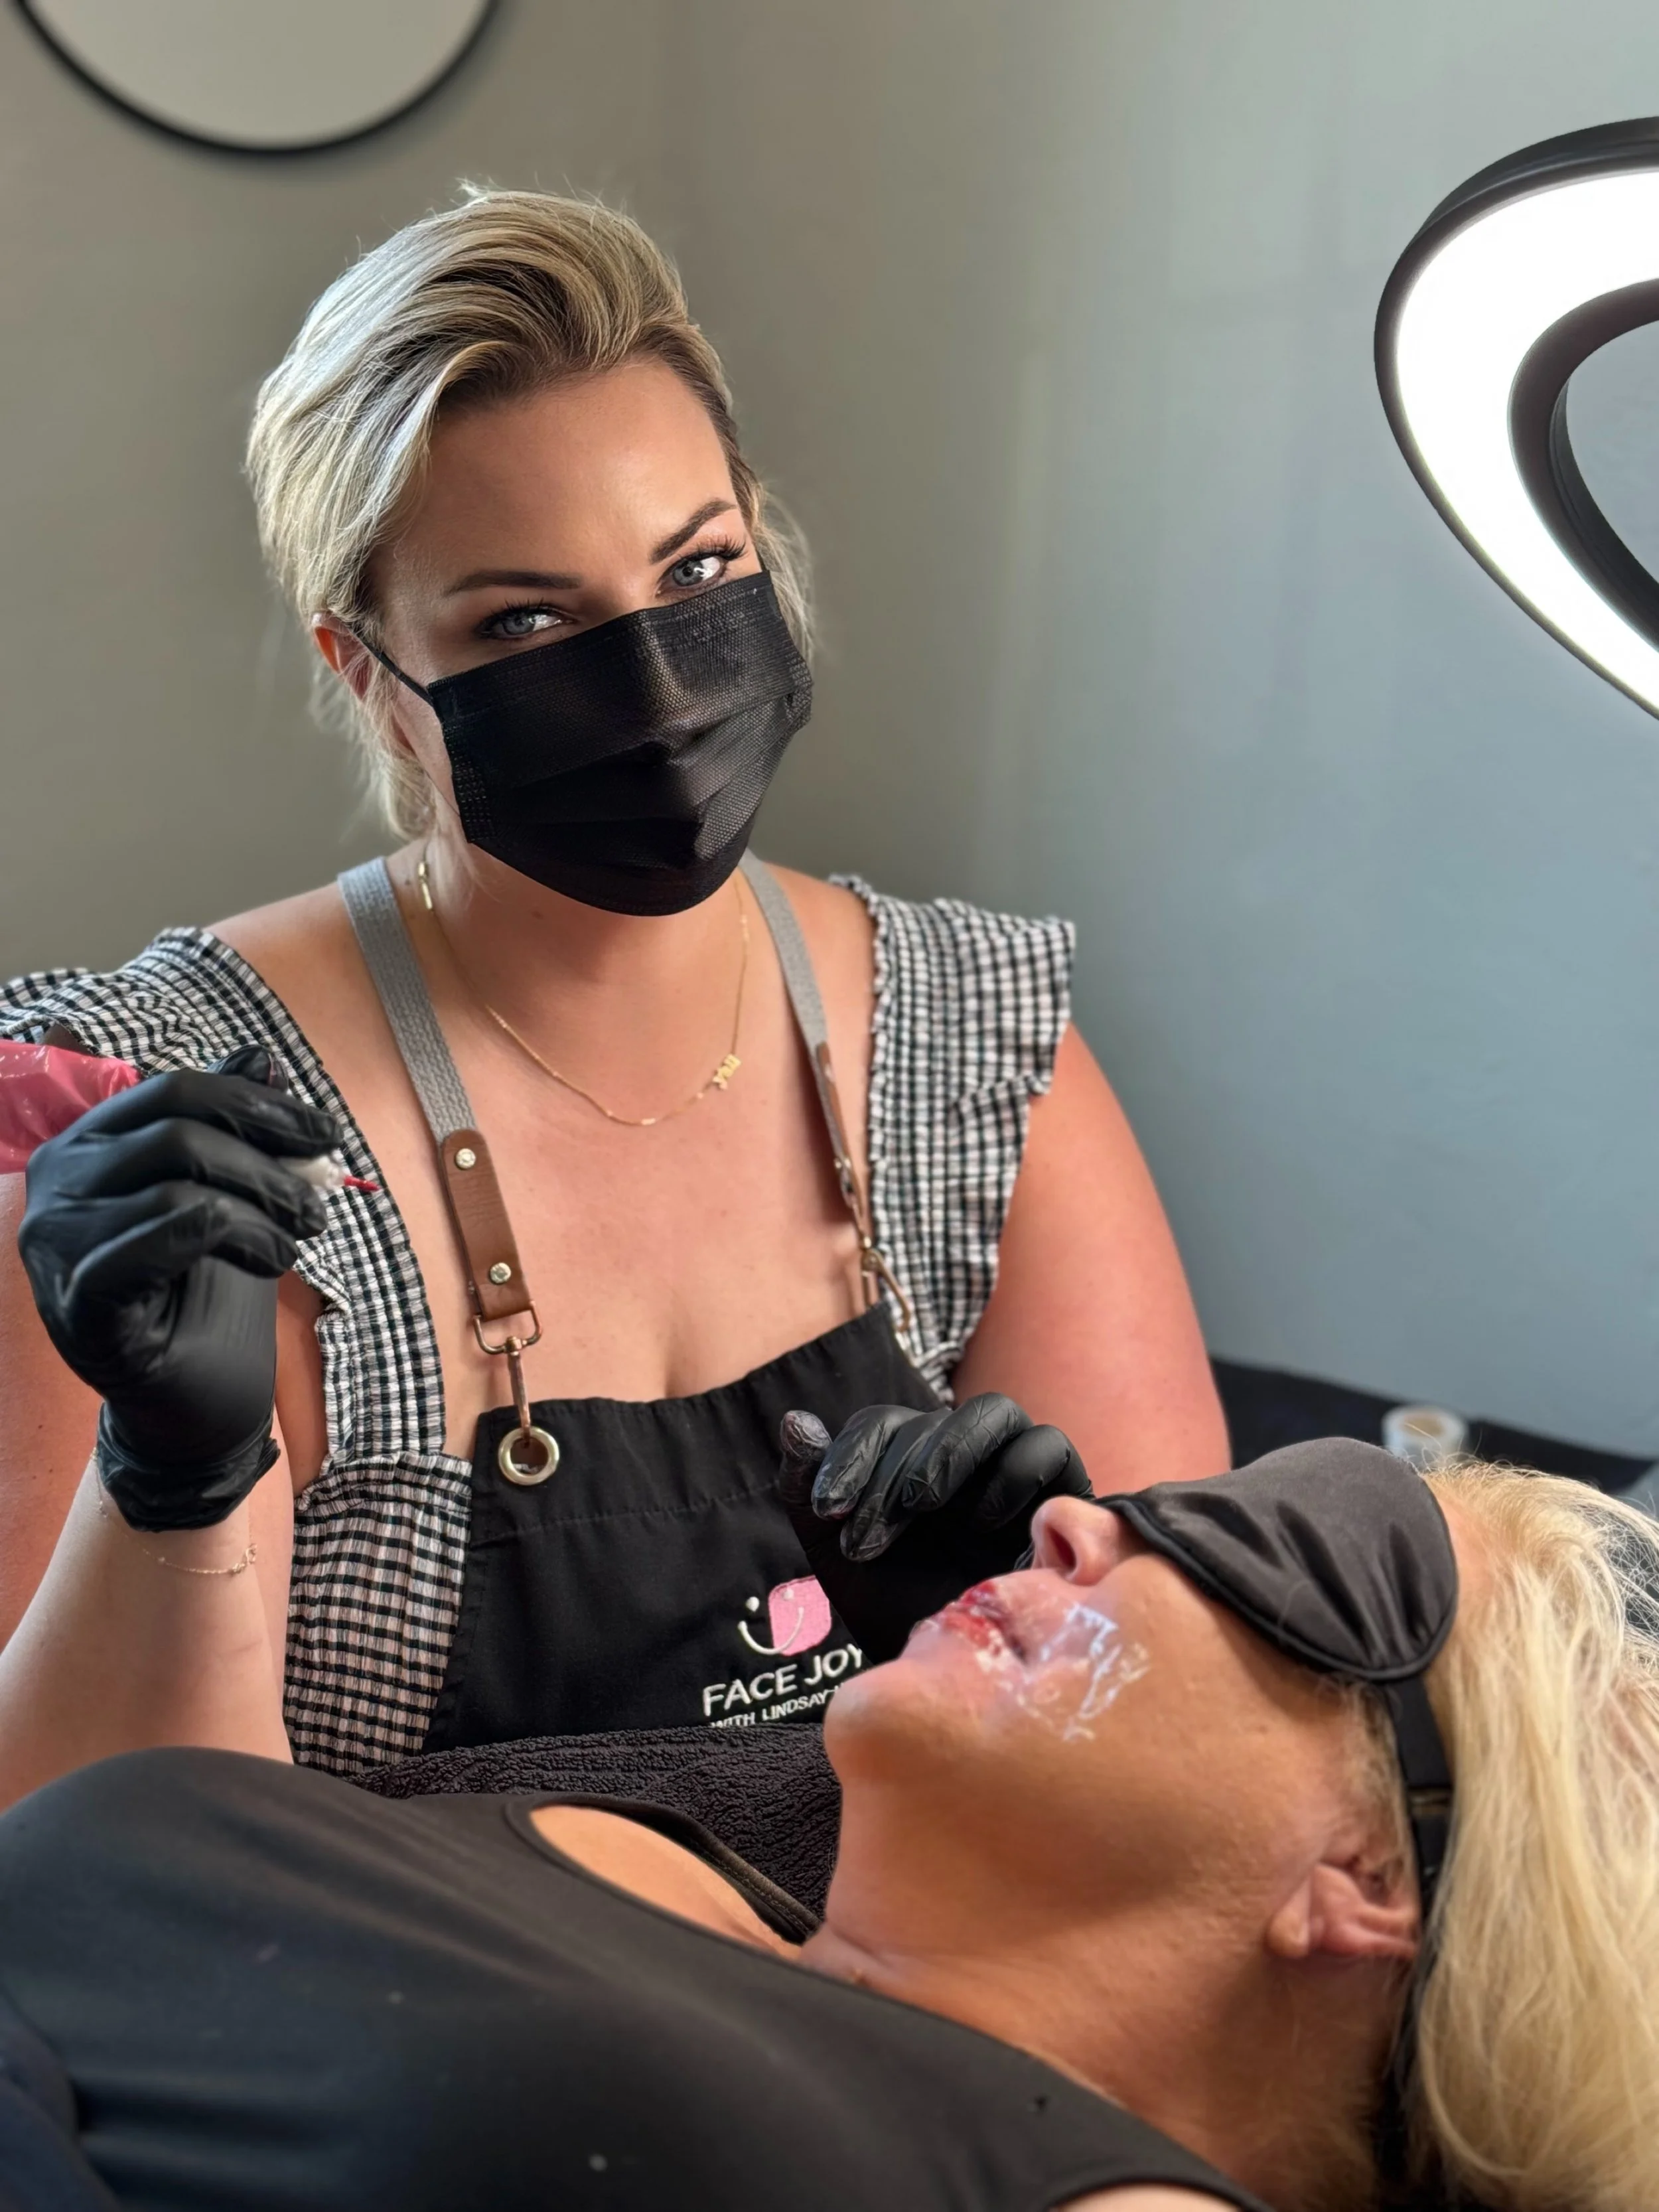
PERMANENT MAKEUP WITH LINDSAY
I’m interested in permanent makeup, so here’s what to do next:
Booking Process:
1.) Carefully review all provided information (below) to determine if you’re a candidate for permanent makeup. Your health history, medications, and ability to follow both pre- and post-care are crucial, as these factors greatly affect comfort during the appointment, pigment penetration, retention, and overall healing.
2.) Complete all consent forms.
3.) Send one clear, makeup-free photo to Lindsay for review. While many cover-ups are successful, not every client qualifies. This step ensures approval in advance and respects both your time and mine.
4.) A non-refundable $100 deposit is required to reserve your appointment date. This deposit will be applied toward your service but will be forfeited if canceled or rescheduled within 72 hours of your scheduled appointment.
Online booking for PMU is not available. Please text Lindsay directly. 405-651-3223
Permanent makeup is completed in at least two sessions.
Why two sessions are needed:
Session 1 – Initial Application
We create the shape, select the color, and design the overall look.
Session 2 – Perfecting Session
Once the skin has fully healed, we assess pigment retention, adjust color as needed, reinforce any areas that have faded, and make refinements for balance, symmetry, and longevity.
Because everyone’s skin heals and retains pigment differently, the second session is essential for achieving the most natural, even, and long-lasting results. In some cases, an additional touch-up may be recommended depending on skin type, lifestyle, and desired intensity.
_____________________________________________
Important Booking Information
Whether you have had permanent makeup done by another artist previously or this is your first time ever, all first-time appointments with Lindsay must be booked as “First Time with Lindsay.”
These appointments are not considered a touch-up or color refresh.
Please book in the following order:
First Time with Lindsay
Touch-Up (scheduled 6–12 weeks after your initial session)
Color Refresh (refer to the recommended timeline, typically 6 months–2 years, depending on skin type and desired intensity)
This booking structure ensures proper assessment, healing, and the best long-term results.
______________________________________________
Although pre-care and post-care may seem very in-depth, it truly comes down to common sense and proper wound care.
With all permanent makeup services, we are creating tiny, controlled punctures in the skin and implanting pigment. This is not as deep as a traditional body tattoo, which means we must do everything possible to support pigment retention and proper healing.
Your body’s natural response to any wound is to begin the healing process. It sends lymphocytes to the area to clear debris and protect the skin. At the same time, your body also attempts to push out foreign material — including pigment.
Lymphocytes produce lymphatic fluid, which is the clear or slightly yellow “oozy” liquid you may notice after a tattoo or PMU service. This is completely normal.
It is essential to gently blot this fluid with the provided cotton pads as instructed. If lymphatic fluid is allowed to build up and dry on the skin, it can form a thick, heavy scab, which may pull pigment out during healing.
Prior to your appointment, our goal is to minimize bleeding, swelling, and sensitivity. This is why we repeatedly advise avoiding:
Heavy workouts
Caffeine
Alcohol
Blood-thinning medications and supplements
When bleeding is excessive, pigment is pushed out of the skin. This can lead to:
Reduced color retention
Increased sensitivity
The need for additional passes during the procedure
Longer healing time
Some light scabbing or flaking is normal, but heavy scabbing is not ideal and can negatively affect healed results.
You were provided with an aftercare balm for a specific reason. This balm acts as a protective barrier, helping to keep the skin lightly moisturized while preventing excessive dryness and scab formation.
Apply a very thin layer only as directed — typically after blotting during the first day and once healing begins, when the area feels dry or tight. Over-applying balm can suffocate the skin and slow healing, so less is more.
During healing, it is important to keep the area clean and free of bacteria. Gently cleanse as instructed using the provided cleanser or a mild option such as Cetaphil or Dial. We want to support healing — not allow bacteria to grow in an open wound.
Following pre-care and post-care instructions directly affects:
Your comfort during the procedure
Pigment retention
Healing time
Final healed results
These guidelines exist to help your body work with the pigment — not fight against it.

LIP BLUSHING
-
Lip Blushing
A soft, permanent tattoo that enhances your natural lip color, shape, and definition. Lip blushing creates the look of fuller, more youthful lips while correcting uneven tones and fading borders. Results are fully customizable—from a subtle “tinted lip balm” effect to a more defined lipstick look. Perfect for anyone who wants effortless, long-lasting lip color without daily makeup. It is NOT a heavy lipstick or lip stain— it’s a blushing of color.
Treatment Process
Lip Blushing is typically complete in two sessions (sometimes a third for corrections, mature skin, or scar tissue that makes color more difficult to implant).Part I: First Time with Lindsay
Complete consent forms & follow pre-care instructions
Arrive with a clean face, no makeup, and avoid alcohol, caffeine, marijuana, or blood thinners for 24 hours prior
Before photos, consultation & color selection (bring a favorite lipstick or photo if you like)
Lip mapping & topical numbing (optional dental block available through our owner/RN Roya — $50/ highly recommended!)
Tattooing (most clients describe it as a light scratch followed by a sunburn sensation)
Aftercare instructions & photos
Schedule Part II
Part II: Touch Up (6–12 weeks after Part I)
Deepen color and refine shape
Fill in any areas that healed lighter than expected
-
Lip blushing may not be suitable for individuals who:
• Have active cold sores (herpes simplex virus) – if prone, take antiviral medication (e.g., Valtrex) before and after the procedure
• Have an active infection, open wounds, or irritation on the lips
• Are pregnant or breastfeeding
• Have uncontrolled diabetes or other conditions that affect healing
• Have a history of keloid or hypertrophic scarring
• Are on blood thinners or take medications that affect healing
• Accutane, steroids or any other questionable rx please ask your physician
• Have had lip filler or tox around mouth recently (wait at least 1 month)
• Are undergoing chemotherapy or immunosuppressive treatments
• Scar tissue from old school lip tattooing/ sun damage may be hard to implant color
• Have unrealistic expectations of the procedure
• Under the age of 18
COLD SORES- If you have a history of cold sores, please reach out to your doctor to request a prescription for Valtrex. Trauma from the procedure can create a cold sore response. You should be on antivirals 3 days before and 3 days after (or as your doctor recommends).
If you don't have a history of cold sores, consider taking L-Lysine for two weeks before and two weeks after your appointment. This natural remedy can help prevent outbreaks and is available in the vitamin section. It is important to note someone who has never had a cold sore can still have the HSV-1. If you get one after the procedure you need to contact your physician ASAP for an antiviral!
RISKS- There is a minor risk of allergic reactions to the numbing agent or ink. Should you experience intense pain during the procedure, it is advisable to request an immediate cessation of the process. Even with preventive measures, it's still possible to develop a cold sore after your appointment or develop an allergy to the ink long after the procedure.
MARIJUANA, ALCOHOL, CAFFIENE, FISH OIL + BLOOD THINNERS- It is crucial to refrain from consuming marijuana, alcohol, and caffeine 24 hours before procedure.
Marijuana can induce unnecessary sensitivity and potential paranoia, while alcohol and caffeine may lead to increased bleeding, swelling, sensitivity, irritation, and wash out pigment penetration.
FILLER & TOX (IN & AROUND LIPS)- If you're thinking about getting lip filler, please schedule your appointment for 30 days after the lip blushing procedure or at least 4-6 weeks before any LIP BLUSHING SERVICE. If you're looking for a skilled injector, I can recommend several experienced, talented professionals.
-
Lip Blushing with Lindsay
Appointment Time
Approx. 3 hours (without Dental Lip Block)
Approx. 1-3 hours (with Dental Lip Block)
Part I: First Time with Lindsay
Pricing
$550 — With Dental Lip Block
$650 — Without Dental Lip Block
Your initial session is fully customized to your facial features and desired outcome—whether this is your first permanent makeup experience or you’ve worked with another artist previously.
If you have existing lip blush from another artist, please text me before booking. Some corrective work may require additional touch-ups to achieve the best result, and I believe in full transparency before your appointment.
About the Dental Lip Block:
Performed by Roya Vernon, RN, this quick local anesthetic injection targets the same nerves used in dental procedures, fully desensitizing the lips prior to treatment.
Unlike topical numbing—which takes longer, can make lips feel rubbery, and may inhibit pigment retention—a dental lip block offers:
Significantly greater comfort
Improved pigment implantation
Less swelling and faster healing
Important:
The dental lip block is paid directly to Roya at the time of service ($50).My pricing with lip block is lower because the block allows me to work more efficiently and apply pigment in significantly less time.
Part II: Touch-Up
(Must be completed 6–12 weeks after Part I)
Pricing
$125 — With Dental Lip Block
$200 — Without Dental Lip Block
This session refines the shape and reinforces any areas that healed lighter than desired. Much like painting a wall, two layers ensure even, long-lasting color.
Note: If you choose a dental lip block for your touch-up, the $50 injection fee is paid separately to Roya.
Extended Touch-Up
(Performed more than 12 weeks after Part I)
$125 — With Dental Lip Block
$200 — Without Dental Lip Block
Color Refresh (Returning Clients)
Over time, pigment naturally fades. A color refresh restores vibrancy, refines shape, and maintains soft, even color.
6+ months: $250
18+ months: $350
30+ months: $425
Scheduling & Coordination
Please text me to schedule your lip blushing appointment.
I will coordinate the dental lip block appointment with Roya for all lip blushing sessions when requested. -
How to Prepare for Lip Blushing
Proper preparation is essential for optimal pigment retention, smooth healing, and your comfort during the procedure. Please read all guidelines carefully. Failure to follow pre-care instructions may affect your results.
1 Week Before Your Appointment
Avoid sunburn, tanning, spray tans, or excessive sun exposure on or around the lips.
Avoid harsh facial treatments near the mouth, including microneedling, chemical peels, lasers, or waxing.
Discontinue exfoliating or “active” products on the lip area, including retinol, glycolic acid, salicylic acid, benzoyl peroxide, or vitamin C.
If you are prone to cold sores (HSV-1), consult your physician about starting an antiviral medication (such as Valtrex or Acyclovir). Lip blushing can trigger outbreaks if not properly prevented.
Avoid dental work, teeth whitening, or major dental procedures for 2 weeks before your appointment.
If you have had lip filler, it must be fully healed and settled. A minimum of 4 weeks post-filler is required.
Notify your artist of any medical conditions, medications, allergies, or recent cosmetic procedures.
24 Hours Before Your Appointment
Avoid all blood-thinning substances, including but not limited to:
Alcohol
Caffeine
Marijuana
Aspirin
Ibuprofen (Advil, Motrin)
Fish oil
Vitamin E
Certain herbal supplements
These substances increase bleeding, which can:
Push pigment out of the skin
Reduce color saturation
Increase swelling and sensitivity
Cause uneven or patchy healed results
Additional guidelines:
Avoid strenuous exercise or heavy workouts (increased blood flow = more swelling).
Stay well hydrated. Healthy, hydrated lips retain pigment better — chapped lips do not.
The Day Before / Night Before
Continue avoiding alcohol, caffeine, and blood thinners.
Do not use lip plumpers, lip stains, or long-wear lip products.
Drink plenty of water and apply a nourishing lip balm frequently.
Gently exfoliate lips using a sugar scrub or soft, dry toothbrush. Do not over-exfoliate or cause irritation.
Day of Your Appointment
Arrive with a clean face and no makeup or skincare products on the lips.
Eat a light meal beforehand so you’re comfortable during the 2–3 hour session.
Many clients choose to take Zyrtec and Pepcid (antihistamines to help reduce swelling) and Tylenol prior to their appointment.
do not take ibuprofen or aspirin.
Bring your favorite lipstick, lip liner, or a reference photo if you have a specific color goal.
Feel free to bring earbuds and listen to music or an audiobook. Please refrain from phone calls or texting during your appointment.
Relax — your lips will be numbed throughout the procedure for comfort.
Important Disclosures & Eligibility
Please reschedule if you are sick, have a fever, an active cold sore, cracked skin, cuts, rashes, or irritation on or around the lips.
Lip blushing is not recommended during pregnancy. If you are pregnant, trying to conceive, or breastfeeding, please disclose prior to booking.
Clients currently using Accutane (isotretinoin) or who have used it within the past 6–12 months may not be eligible.
Smoking or vaping before and after your appointment can negatively impact healing and pigment retention. Smokers may heal lighter and often require additional touch-ups.
If you are on antibiotics, immunosuppressants, or have had recent vaccines, please disclose prior to your appointment.
Healing & Results Expectations
Swelling, tenderness, and a bold or intense color are normal immediately after the procedure.
Color will soften and fade significantly during the healing process over the following weeks.
Lip blushing is a multi-step process. A touch-up appointment is typically required to perfect color and symmetry and is not included unless otherwise stated.
✨ Pro Tip:
Healthy, moisturized lips = better healed results. Begin applying a nourishing balm (such as Aquaphor or plain Vaseline) nightly during the week leading up to your appointment. -
🚫 Food + Drink
Avoid spicy, salty, or acidic foods for the first few days.
Drink through a straw to minimize irritation.
Avoid alcohol and smoking during the healing process.
🏃 Activities
Avoid sun exposure, swimming, saunas, hot tubs, and heavy exercise for at least 1 week.
Refrain from kissing or oral activities to prevent irritation/infection.
💧 Hydration
Keep lips moisturized with a thin layer of healing ointment (Aquaphor, A&D, or your artist’s recommendation).
Stay hydrated—drink plenty of water.
💉 Filler + Tox
Wait a minimum of 30 days after lip blushing before getting lip filler or tox around the mouth.
🪥 Toothpaste & Oral Care
Avoid letting toothpaste or mouthwash with whitening/bleaching agents (hydrogen peroxide) touch your lips while healing.
📆 Healing Timeline
First 24–48 Hours
Gently dab lips with a clean tissue to remove lymph fluid.
Do not touch, pick, or rub your lips.
Apply a thin layer of your healing ointment regularly.
No kissing or saliva contact.
Drink with a straw.
Avoid spicy, salty, or acidic foods.
Days 3–7: Peeling Phase
Lips may flake/peel—this is completely normal. Do not pick at flakes.
Continue applying a thin layer of healing ointment.
Stay hydrated and avoid sun exposure.
No lip makeup until fully healed.
Weeks 2–4: Healing & Color Development
Color may look darker at first, then lighten, then reappear as lips heal.
Use a fragrance-free lip balm for hydration.
Avoid sun exposure, exfoliation, and harsh skincare treatments near lips.
✨ Healing is a process—final healed color is usually visible after 6–8 weeks. A touch-up session is necessary 6-12 weeks after, for best results.
Long-Term Care-SCHEDULE YOUR TOUCH-UP APPOINTMENT!
Must be done 6-12 weeks post “First Service”
Long Term Care-
Always wear SPF lip balm to prevent premature fading.
Avoid harsh exfoliants, lip plumpers and lip stains with alcohol for longevity.
Be cautious with teeth bleaching agents.
Avoid smoking.

LASH ENHANCEMENT
-
PMU Lash Enhancement is a permanent tattoo applied along the top lash line.
Can range from very natural (tiny dots between lashes) to more defined (a soft-liner effect).
Enhances the eyes without looking like heavy eyeliner.
Works for all ages and skin types.
Typically lasts 1–3 years depending on skin type, pigment, and aftercare.
The Process
Consultation (at time service)
Discuss desired look: natural, medium, or more defined.
Review medical history (eye conditions, allergies, medications, etc.).
Choose pigment color (usually black or dark brown=black).
Preparation
Arrive with no makeup and no contact lenses.
Cleanse the eye area thoroughly.
Apply topical numbing cream to minimize discomfort.
Decide on lash line thickness and style.
Application
Using a fine needle or PMU machine, pigment is implanted just below the skin surface along the lash line.
Technique can be:
Micro-dots: tiny dots between lashes for subtle enhancement.
Soft eyeliner: a thin, continuous line for a more noticeable effect.
Healing
Minor redness or swelling may occur.
Healing takes about 5–7 days for surface healing, full pigment settling in 4–6 weeks.
Follow aftercare instructions: avoid rubbing eyes, swimming, saunas, and heavy makeup during healing.
Touch-Up
Usually one touch-up 6–12 weeks after the initial session to perfect pigment retention and color intensity.
Benefits
Eyes look naturally defined without makeup.
Smudge-proof and waterproof.
Saves time in daily makeup routine.
Enhances lash appearance even without mascara
-
✨ Who is a Candidate for PMU Lash Enhancement?
PMU Lash Enhancement is perfect for many people, but some factors determine whether it’s the right fit.
✅ Good Candidates
Anyone who wants subtle, natural-looking definition along the lash line.
Clients with sparse, light, or uneven lashes who want them to appear fuller.
Busy clients who want to wake up with defined eyes without daily eyeliner.
Those with normal to dry skin around the eyes (helps pigment retain better).
⚠️ Possible but with Considerations
Oily or acne-prone eyelids: Pigment may fade faster or blur slightly.
Sensitive skin or allergies: Mild redness or irritation is possible.
Previous permanent eyeliner or lash enhancement tattoos: May require touch-up or color correction.
❌ Not Candidates (Contraindications)
Pregnant or breastfeeding.
Under 18 years old.
Active eye infections, eyelid dermatitis, or recent eye surgeries.
History of keloid or hypertrophic scarring.
Use of blood thinners (prescription or supplements) that cannot be paused.
Recent Botox, fillers, chemical peels, or laser around the eye area (must wait 2–4 weeks).
Recent tanning or sunburn near the eye.
-
Permanent Lash Enhancement with Lindsay
Approx. 1.5 hoursPart I: First Time with Lindsay — $375
Your initial session, fully customized to your features and desired look. Whether you’ve been with a previous artist or this is your first time.Part II: Touch-Up — $125
(Must be completed 6–12 weeks after Part I)
Refines shape and darkens areas that healed too light. Much like painting a wall, color needs two layers for the best, long-lasting results.Extended Touch-Up — $200
For touch-ups performed longer than 12 weeks after Part I.Color Refresh (Returning Clients)
Over time, pigment naturally fades. A Color Refresh helps restore vibrancy, redefine shape, and maintain a soft, even color:12–24 months: $200
24+ months: $300
-
✨ How to Prepare for PMU Lash Enhancement
1 Week Before
Discontinue eyelash growth serums (like Latisse, GrandeLash, etc.) to avoid increased sensitivity and bleeding. (Bleeding pushes out pigment.)
Remove eyelash extensions at least 3–4 days prior to allow the lash line to breathe.
Avoid lash lifts or tints within 1 week of your appointment.
Stop using retinol, glycolic, or other exfoliating products around the eye area.
48 Hours Before
Avoid alcohol, caffeine, marijuana, and blood-thinning medications/supplements (aspirin, ibuprofen, fish oil, vitamin E, etc.).
Do not perm, curl, or dye your lashes.
24 Hours Before
No waterproof mascara, lash glue, or heavy eye creams.
Get plenty of rest and stay hydrated.
Day of Appointment
Arrive with clean eyes (no makeup, mascara, eyeliner, lash glue, or skincare on the lids/lashes).
Wear glasses instead of contacts (contacts must be removed before the procedure).
Eat a light meal before your appointment to stay comfortable during the ~3-hour session.
I always take Zyrtec, Pepcid (both antihistamines for swelling) and Tylenol before receiving PMU.
Relax—your lash line will be numbed for comfort. Most clients describe the sensation as tickly or scratchy but very tolerable.
✨ Pro Tip: Healthy lashes and skin = better healed results. Nourish your eyes with gentle cleansing, hydration, and avoid anything that might irritate the lash line before your session.
-
✨ PMU Lash Enhancement Aftercare & Healing
Caring for your lash line properly ensures the best healed results. Please follow these instructions carefully.
Immediately After
Eyes may feel slightly puffy, tender, or like you’ve been crying—this is normal and should subside within 24 hours.
Pigment may appear darker and more intense at first.
Healing Timeline
Days 1–3:
Lash line looks bold, dark, and crisp.
Mild swelling or tightness may occur.
Days 4–7:
Light flaking or scabbing may occur along the lash line.
Pigment may look uneven—do not pick, rub, or scratch.
Days 7–14:
Color may appear faded, patchy, or “disappear” as the skin heals over pigment. This is temporary.
Weeks 3–6:
Pigment resurfaces and softens into its true healed shade.
A Touch-Up (6–12 weeks after Part I) perfects shape and color.
Aftercare Instructions
✅ Do:
Keep lash line dry for the first 24 hours.
From Day 2, gently cleanse eyes with lukewarm water and pat dry.
Use only aftercare balm if provided—apply sparingly with a clean cotton swab if the lash line feels tight or itchy.
Sleep on a clean pillowcase.
❌ Avoid:
Mascara, eyeliner, lash glue, or eye makeup on/near lash line for 14 days.
Picking or rubbing the lash line (this can pull pigment out).
Swimming pools, hot tubs, saunas, or ocean water for 2 weeks.
Heavy sweating or steam directly on the eyes for at least 1 week.
Lash extensions, lash lifts, or tinting until fully healed (about 2–3 weeks).
Long-Term Care
Always remove eye makeup gently to avoid premature fading.
Use SPF around the eye area to protect pigment from UV light.
Avoid harsh chemical peels or laser directly over lash line.
Plan for a Color Refresh every 1–2 years to maintain definition.
✨ Remember: Your lash line will look darker at first, then lighter, then settle into its healed color after your touch-up. Trust the process and avoid touching—your results will be worth it!
BROW ART
-
PERMANENT MAKEUP BROWS are a cosmetic tattoo designed to enhance the shape, fullness, and symmetry of your eyebrows. Using specialized techniques and pigments, the brows are tailored to your face and desired look, ranging from soft and natural to more defined and filled-in.
This service is perfect for anyone who wants:
Effortless, wake-up-and-go brows
Correction of sparse, uneven, or thinning brows
A polished look without daily penciling or powder
Long-lasting results that fade softly over time
The Process
Consultation & Mapping: Brows are measured and shaped to suit your facial features.
Color Selection: Pigment chosen to complement your skin tone and natural brow hair.
Numbing: A topical anesthetic helps keep you comfortable.
Tattooing: Hair-stroke, powder, or combination techniques used depending on your goals and skin type.
Touch-Up Session: 6–12 weeks later to refine color and shape.
Longevity: Results typically last 2–3 years, (depending on lifestyle and care), gradually fading with time. Maintenance “Color Refresh” sessions are recommended for best long-term results.
-
Who is a Candidate for PMU Brows?
PMU Brows are ideal for many people, but not everyone is a candidate. Here’s a breakdown:
✅ Good Candidates
Those with sparse, thin, or uneven brows who want more definition.
People with busy lifestyles who want “wake up and go” brows.
Clients with normal to dry skin (tends to retain pigment best).
Mature clients experiencing hair loss or faded natural brows.
Anyone seeking long-lasting, low-maintenance brow color and shape.
⚠️ Possible but with Considerations
Oily or acne-prone skin: Can cause pigment to fade faster or heal softer. Powder/Ombre brows are often recommended over hair strokes.
Sensitive skin or large pores: May experience more redness, swelling, or blurred pigment edges.
Previous brow tattoos: Correction is possible, but may require removal or additional sessions.
Scar tissue in the brow area: May take multiple sessions for even pigment.
❌ Not Candidates (Contraindications)
Pregnant or breastfeeding.
Under 18 years old.
Skin conditions in the brow area (eczema, psoriasis, dermatitis, active acne).
History of keloid or hypertrophic scarring.
Uncontrolled diabetes or other conditions that impair healing.
Use of blood thinners (including certain prescriptions, aspirin, or fish oil) that cannot be stopped.
Recent Botox, fillers, or chemical peels (must wait 2–4 weeks).
Recent tanning or sunburn in the brow area.
✨ Pro Tip for Clients: If you’re unsure whether PMU brows are right for you, book a consultation first. I’ll assess your skin, medical history, and brow goals to make sure it’s safe and successful.
-
Permanent Brow Art with Lindsay
Approx. 3.5 hoursPart I: First Time with Lindsay — $499
Your initial session, fully customized to your features and desired look. Your initial session, fully customized to your features and desired look. Whether you’ve been with a previous artist or this is your first time. If you have been with a previous artist, please text me prior to booking. Some corrective work may require laser removal first, or additional touch ups to achieve the best outcome- I always want to be transparent with you.Part II: Touch-Up — $125
(Must be completed 6–12 weeks after Part I)
Refines shape and darkens areas that healed too light. Much like painting a wall, color needs two layers for the best, long-lasting results.Extended Touch-Up — $200
For touch-ups performed longer than 12 weeks after Part I.Color Refresh (Returning Clients)
Over time, pigment naturally fades. A Color Refresh helps restore vibrancy, redefine shape, and maintain a soft, even color:12–24 months: $250
24+ months: $350
-
How to Prepare for PMU Brows
Proper preparation ensures the best results, smoother healing, and a more comfortable experience. Please read carefully before your appointment.
1 Week Before
Avoid tanning, sunburn, chemical peels, or harsh skincare on/around the brows.
Stop using exfoliating or resurfacing products (retinol, glycolic, salicylic, tretinoin, etc.) near the brow area.
If you’ve had Botox, filler, brow waxing/threading, or brow lamination, wait at least 2 weeks before your PMU session.
If you are prone to keloids, scarring, or unusual skin reactions, please consult your physician first.
Text me a well-lit, no-makeup photo of your face, plus examples of brows you like—I can pre-draw ideas for you.
24 Hours Before
Avoid: alcohol, caffeine, marijuana, or blood-thinning medications/supplements (aspirin, ibuprofen, fish oil, vitamin E, etc.). Always consult your doctor before stopping prescribed medications.
Do not tweeze or wax your brows—you’ll come in with your natural hair growth for accurate brow mapping.
Keep brows clean and free from heavy creams or oils.
Stay hydrated and get a good night’s sleep.
Day of Appointment
Arrive with a clean face—no makeup or skincare on your brows.
Eat a light meal beforehand so you’re comfortable during the ~3-hour session.
(Optional) Some clients take Zyrtec + Pepcid (for swelling) and Tylenol before PMU for added comfort.
Relax—I’ll numb the area to keep you comfortable, and we’ll take before & after photos.
You’re welcome to bring AirPods for music or an audiobook, but please stay off your phone and plan to avoid calls/texts during the session.
✨ Pro Tip: Well-moisturized skin heals better! Apply a gentle, fragrance-free moisturizer nightly leading up to your appointment, but avoid heavy oils/occlusives on your brows the day of.
-
PMU Brows Aftercare & Healing
Proper aftercare is the key to beautiful, long-lasting brows. Please follow these instructions carefully:
Immediately After Your Appointment
Your brows will look darker and bolder than expected—this is normal.
Mild redness, swelling, or a tight feeling may occur for the first 24 hours.
Healing Timeline
Days 1–3:
Brows look dark, bold, and defined.
Skin may feel tender, tight, or slightly swollen.
Days 4–7:
Brows begin to scab or flake—DO NOT pick, scratch, or peel.
Some itching is normal; gently tap instead of scratching.
Days 7–14:
Brows may appear patchy, uneven, or too light as the skin heals over pigment.
Color will “hide” under healing skin—this is normal.
Weeks 3–6:
Pigment resurfaces, softens, and settles into its true healed color.
A touch-up at 6–12 weeks is needed to perfect shape and color.
Aftercare Instructions
✅ Do:
Keep brows dry for the first 24 hours.
From Day 2, gently cleanse with lukewarm water + mild fragrance-free cleanser (pat dry).
Apply a thin layer of recommended healing ointment (Aquaphor, A&D, or provided balm) if brows feel tight/dry.
Sleep on a clean pillowcase.
❌ Avoid:
Picking, scratching, or rubbing brows.
Makeup, lotions, or skincare on the brows until fully healed.
Excessive sweating (workouts, saunas, hot yoga) for at least 7–10 days.
Sun exposure, tanning, pools, hot tubs, or ocean water for 2 weeks.
Chemical peels, retinols, or exfoliants near brows for at least 4 weeks.
Long-Term Care
Always use SPF on healed brows to prevent premature fading.
Avoid laser treatments directly over brows unless cleared by your provider.
Plan for a Color Refresh every 1–2 years to maintain your desired look.
✨ Remember: Brows go through an “ugly duckling” phase before healing beautifully. Trust the process and resist the urge to touch or pick—your touch-up appointment will perfect everything.
PMU PORTFOLIO
PRECARE + AFTERCARE ARE ABSOLUTLEY ESSENTIAL!
PRECARE + AFTERCARE ARE ABSOLUTLEY ESSENTIAL!
PRECARE + AFTERCARE ARE ABSOLUTELY ESSENTIAL TO:
THE COMFORT OF YOUR SERVICE
TIME IS TAKES TO PERFORM YOUR SERVICE
COLOR RETENTION
HEALED RESULTS
Frequently Asked Questions
-
Is Permanent Makeup Ink Safe?
PMU is both an art and a science— and pigment safety matters.
Permanent makeup is a widely performed cosmetic procedure, and when done correctly by a trained professional using high-quality products, it is generally considered safe. That said, PMU is a form of cosmetic tattooing, which means pigments are implanted into the skin, and it’s important for clients to understand both the benefits and the risks.
With every new pigment line comes another round of marketing buzzwords designed to make their product seem revolutionary. The truth? Much of it is smoke and mirrors.
I will tell you the lines I use if you’d like to do more research. Transparency is something I find necessary in my practice.
The best results come from:
- Understanding pigment chemistry
- Matching pigment type to skin type and goal
- Using up to date, regulated EU REACH-compliant formulations
- Artist education over pigment marketing terms
-
Types of Pigment + Chemistry
Permanent makeup pigments are not makeup and not tattoo ink, even though they share similarities. PMU pigments are engineered to sit in the upper dermis, fade predictably, and heal in harmony with skin undertones.
Key chemistry concepts:
Inorganic pigments: Mineral/earth-based (iron oxides, titanium dioxide); more muted, larger particle size which can lead to faster fading and blurring. As iron oxides break down they can fade to peach, salmon or ashy gray.
Organic pigments: (organic is NOT food related) Brighter, more vibrant, lab-created, carbon-based, smaller particle size, hold color longer, often used for lips and areolas.
Hybrid formulations: Many modern PMU lines are hybrid pigments, meaning the combine both inorganic and organic components to balance longevity, softness and stability.
Carrier solutions influence spread, implantation ease, and initial brightness—not just the color itself.
Pigment behavior is affected by:
- Skin pH
- Immune response
- Sun exposure
- Depth of implantation
- Pre and Post-Care compliance
-
EU REACH Compliance
EU (European Union) REACH stands for Registration, Evaluation, Authorisation, and Restriction of Chemicals.
It is one of the strictest chemical safety regulations in the world, governing what substances can be used in products that contact the skin long-term—including permanent makeup pigments.EU REACH regulations were updated specifically for tattoo and PMU pigments to address:
- Long-term toxicity
- Pigment breakdown over time
- Heavy metal exposure
- Allergenic and carcinogenic byproducts
Why EU REACH Compliance Matters in PMU
PMU pigments are implanted into the skin, not washed off. That means safety standards must account for:
- Years of exposure
- UV breakdown
- Immune system interaction
- Migration and fading behavior
REACH-compliant pigments are formulated to:
Limit or eliminate restricted heavy metals (nickel, chromium, cadmium, mercury)
Avoid banned azo dyes that can break down into carcinogenic amines
Reduce allergenic preservatives
Fade more predictably and evenly, rather than shifting unpredictably
This isn’t about being “better” or “stronger” pigment—it’s about safer chemistry over time.
-
What EU REACH Compliance Does Not Mean
Important for both clients and artists to understand:
It does not mean zero risk (nothing implanted ever is)
It does not guarantee perfect color retention
It does not replace artist education or proper technique
It does not mean the pigment won’t fade
Ethical PMU expects fading and touch-ups.
-
PMU and MRI
Permanent makeup can sometimes feel warm or slightly irritated during an MRI because many pigments contain iron, which can interact with the magnetic field. Freshly treated areas may be more sensitive, but the sensation is usually mild and temporary. Always let your MRI technician know you have PMU so they can monitor your comfort.
-
Do I Need to Remove Old PMU?
If you’ve had PMU done before, you may or may not need removal. Sometimes it can simply be corrected or refreshed, but dark or stubborn pigment may require lightening first. You can text me a photo for a quick opinion. I offer saline removal, but for the most effective results—especially with laser removal—our nurse/owner, Roya Vernon, is the expert to handle it.
-
Why Are You So Crazy about Pre-Post Care?
Pre- and post-care are crucial for ensuring comfort, pigment retention, and proper healing. Following guidelines helps your skin accept the pigment, prevents complications, and ensures the final result is even and long-lasting. Skipping or ignoring care instructions can lead to uneven color, very light color, early fading.
What Can Cause Bleeding:
Excessive bleeding during a PMU procedure can reduce pigment retention because the body pushes the pigment out. Common causes include:
Medications and supplements: Blood thinners (e.g., aspirin, ibuprofen, fish oil)
Alcohol or caffeine: Can thin the blood
High blood pressure or stress: Increases bleeding tendency
Hormonal fluctuations: Can make skin more sensitive
Skin condition or trauma: Inflammation, irritation, or sunburn
Why it matters:
When the skin bleeds heavily, the pigment can be “bled out” of the dermis, leaving patchy, faded, or uneven results. This is why pre- and post-care instructions exist—to minimize bleeding and swelling and maximize healing and pigment retention. -
How Long Will My PMU Last?
Permanent makeup isn’t truly permanent—it gradually fades over time. Most PMU lasts 1–3 years, depending on:
- Skin type and oiliness
- Pigment type and depth
- Sun exposure and skincare habits
- Lifestyle factors (medications, exfoliation, etc.)
When to Expect a Color Refresh
It’s completely up to you when you want a Color Refresh. For instance, My lips were blushed a year ago and they are ready for a Color Refresh whereas my brows were done 6 years ago and I think they still look fine.
-
How Do I Book?
Scroll above and read the instructions. Once you’re ready, you will text me to schedule.